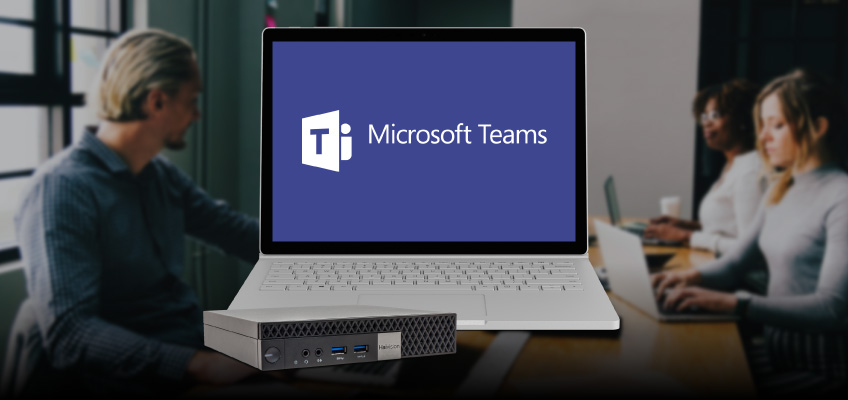
Microsoft Teams, an enterprise tool for collaboration and communication, is one of the most exciting developments for Office 365 in a while. With its total number of users having eclipsed those of rival Slack this past year, Microsoft Teams’ momentum continues to build. Featuring a variety of tools, including video and text chat functions, as well as live video events, to enable communication internally and externally, it’s easy to understand why it’s so popular.
We explained in our previous blog post how Microsoft Teams is changing the way that organizations use live video to communicate – they can now share high-quality live video with minimal delay, giving attendees the feeling of being connected to the presentation. With a good camera and quality video encoder, your organization can start presenting high quality live video events, engaging with both your internal and external partners and fostering real connections.
In this post, we will show you how you can easily set up a live event in Microsoft Teams and how to configure your video encoder. We’re using the Haivision KB video encoder for this setup; it’s an ideal video encoder for enterprise streaming and is also one of the approved video encoders to use for live streaming with Microsoft Stream.
Step 1: Connect Your Camera to Your Video Encoder
First, you want to have your physical set for your live event ready, with your camera set up. Ensure that your Haivision KB video encoder is plugged into your camera, as well as connected to your network.
Step 2: Create Your Live Event in Microsoft Teams
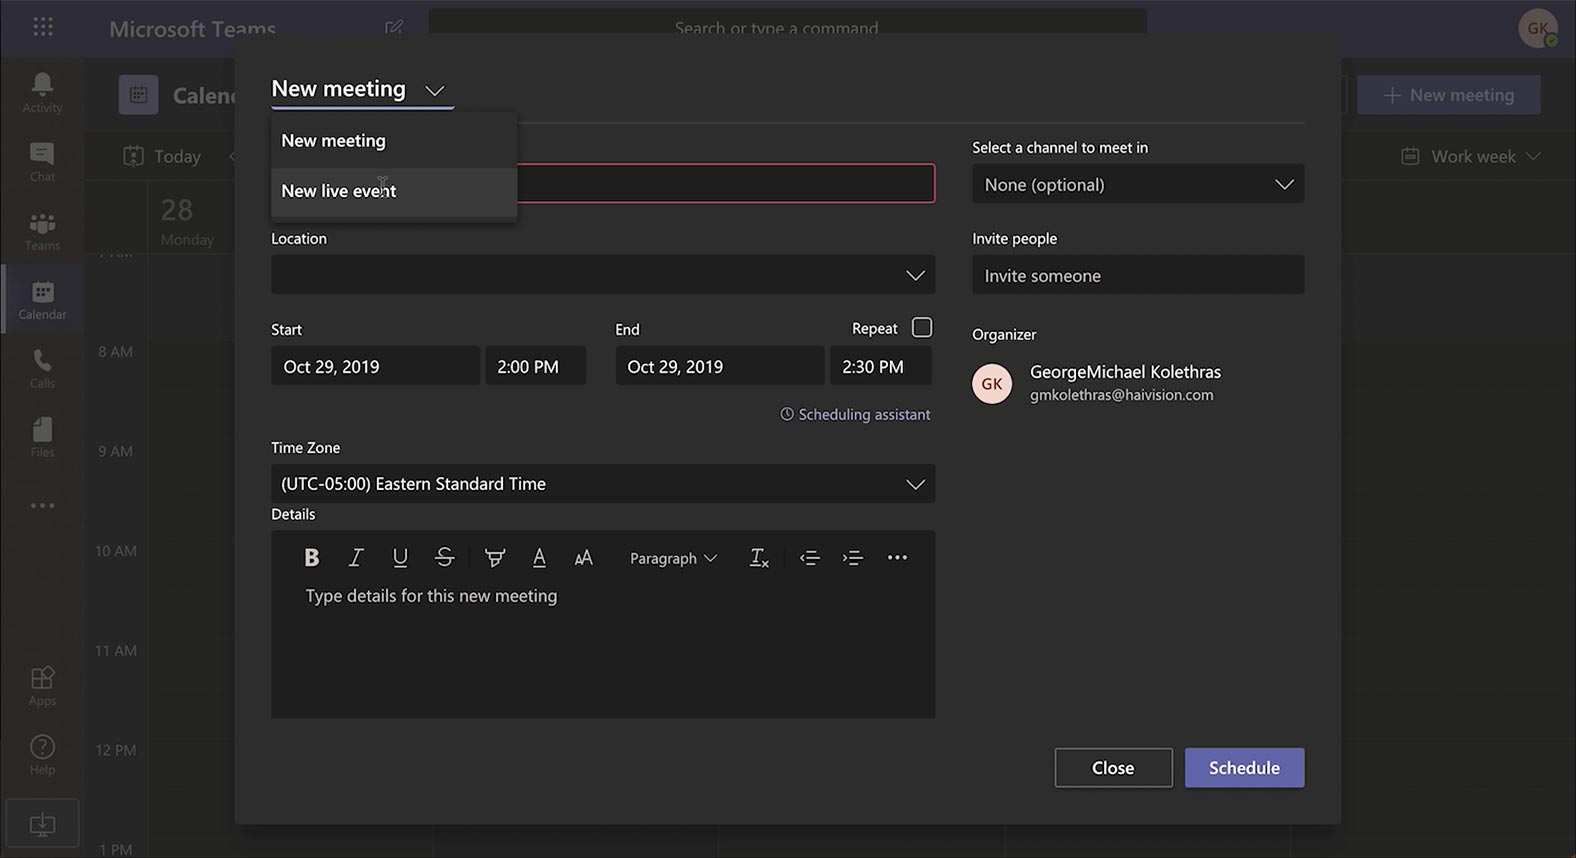
Log in to Microsoft Teams, and from the calendar view, click on “New Meeting” in the upper-right corner.
In the “New Meeting” window, select “New live event” from the top drop-down menu. Then enter your live event’s title, description, and other relevant information. When you’re done, click “Next.”
Step 3: Setting Up Your Live Event
Select your event permissions to determine who you wish to share your live video event with.
Microsoft Teams gives you three options:
- “People and Groups” – only those individuals that you have invited will have access.
- “Org-wide” – anyone signed in to your organization will be able to access and watch the live video
- “Public” – anyone can access your event, regardless if they are signed in. This is usually the best setting when the majority of your attendees are from outside of your organization.

Please note that your IT department may restrict your ability to broadcast live events publicly. It’s always best to check in with your IT department before setting up your live video event.
Once you have selected your event permissions, in the same window, scroll down to “How will you produce your live event” and select “an external app or device.” You will also be presented with the option to enable recording, captions, or a Q&A, depending on the needs of your event.
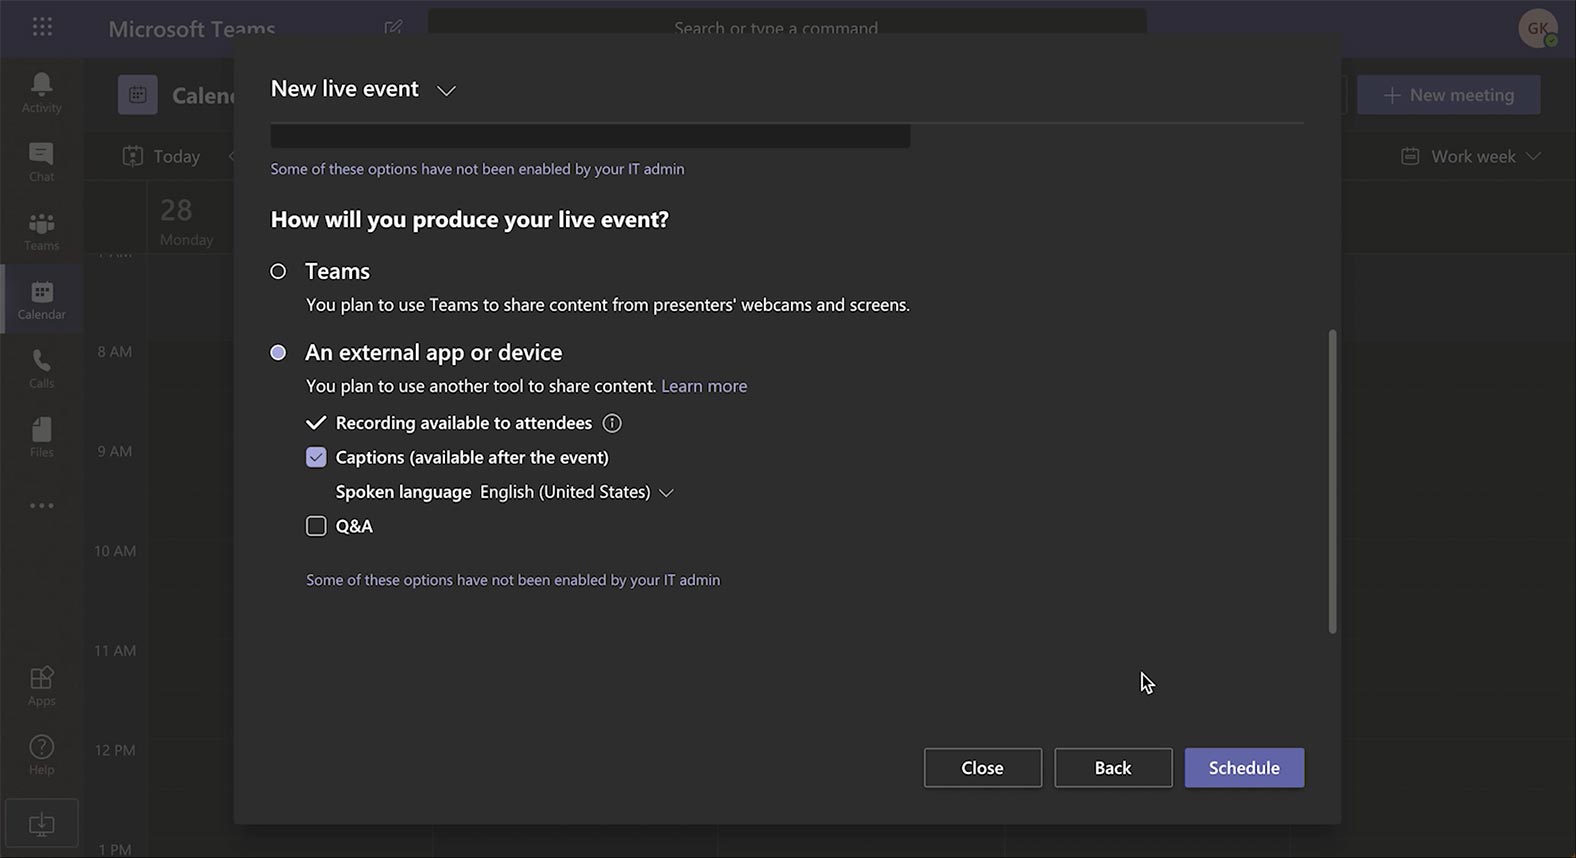
Click “Schedule” to move forward to the next step.
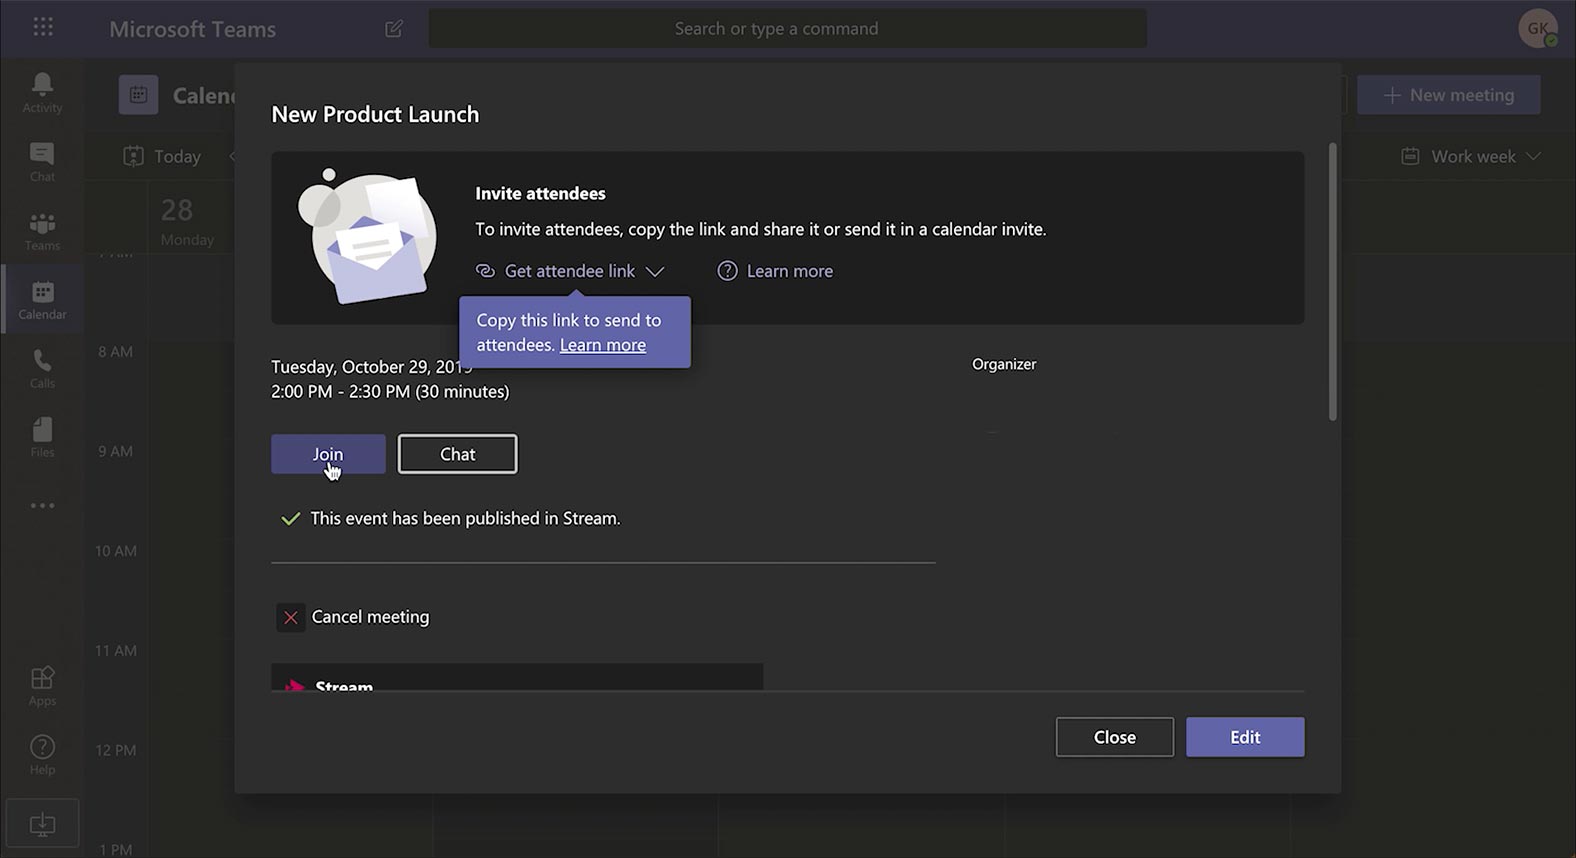
Step 4: Joining as a Producer or Presenter
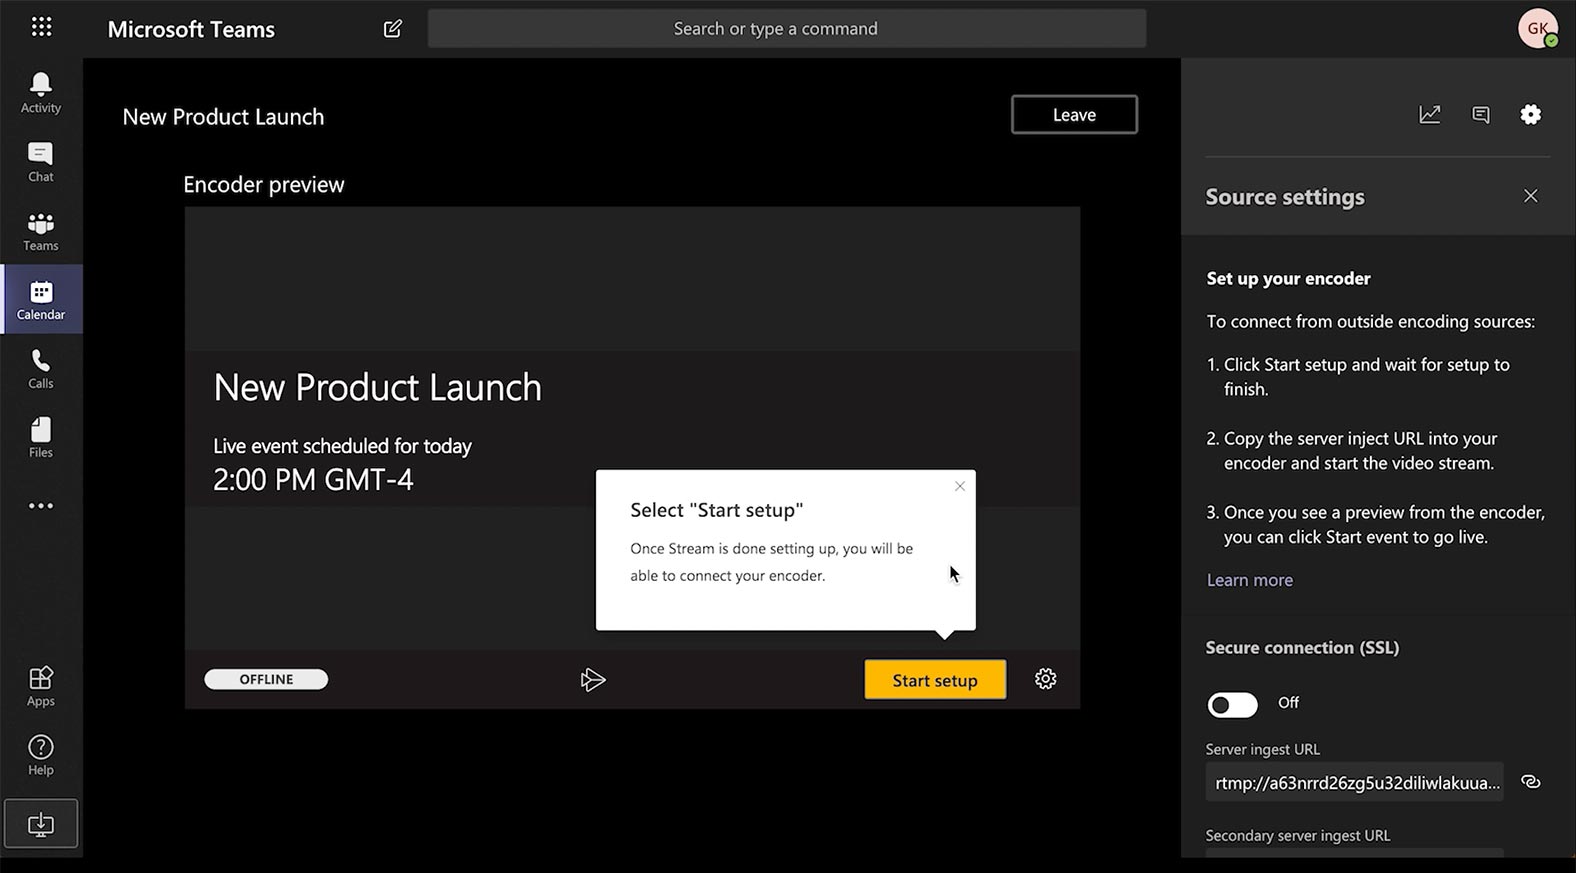
Now you can “join” the live event as a producer or presenter, and then be taken to the video encoder preview.
In the video encoder preview, click on “Start Setup.” At this time, you should also look to the right of your screen, where you can turn “secure connection” to the “On” position, and copy the “Server ingest URL” – this will be needed once you are in the KB video encoder’s setup.
Step 5: Setting Up Your Video Encoder
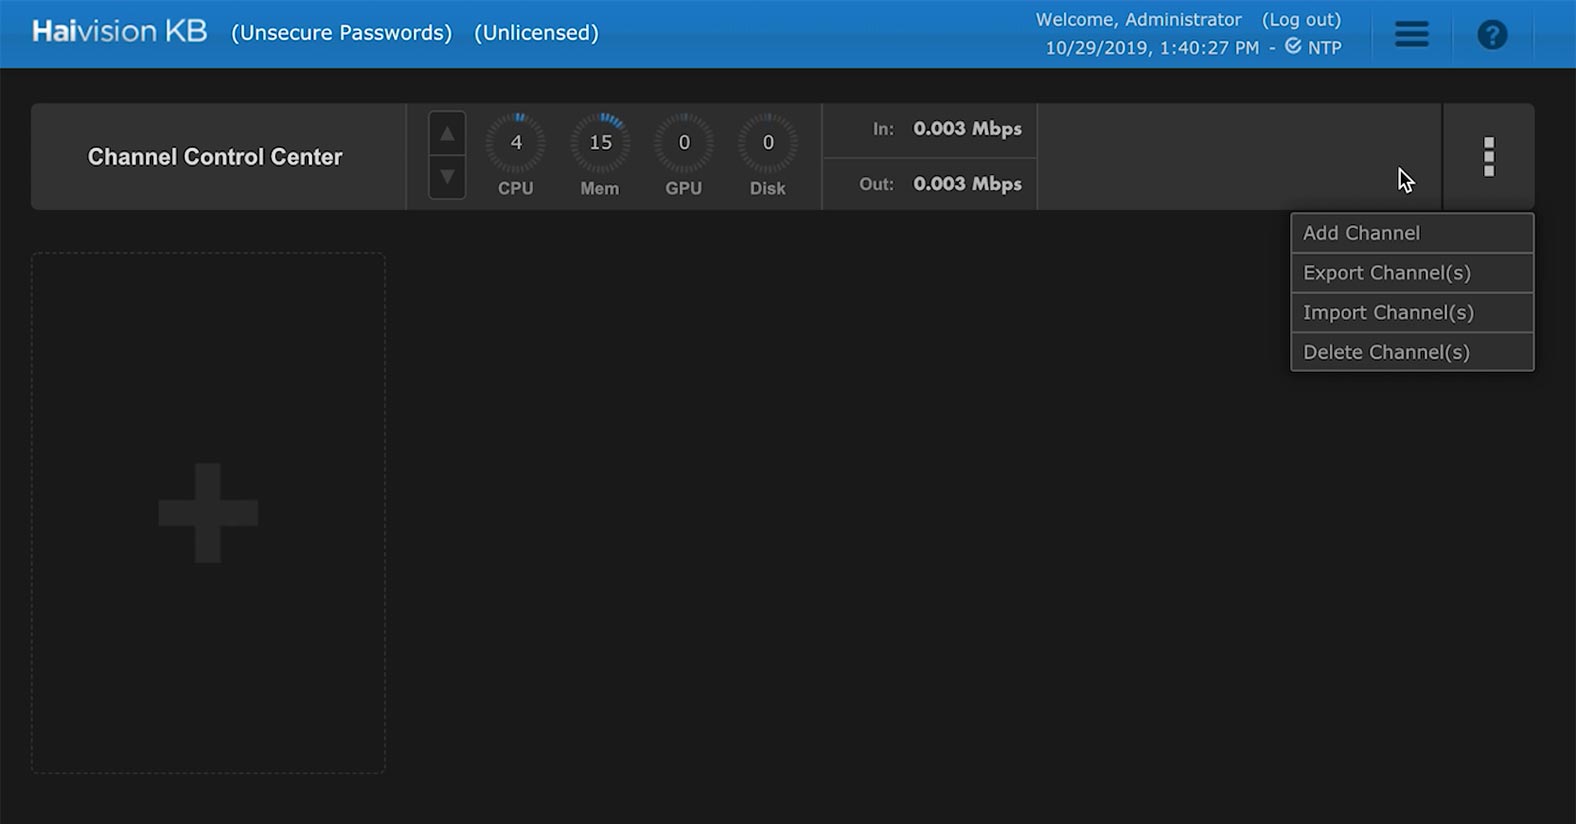
Log in to your KB video encoder, which, as mentioned in Step 1, should already be connected to your camera.
From the Channel Control Center, click on the right-hand menu (three vertical dots,) and select “Add Channel” from the drop-down.
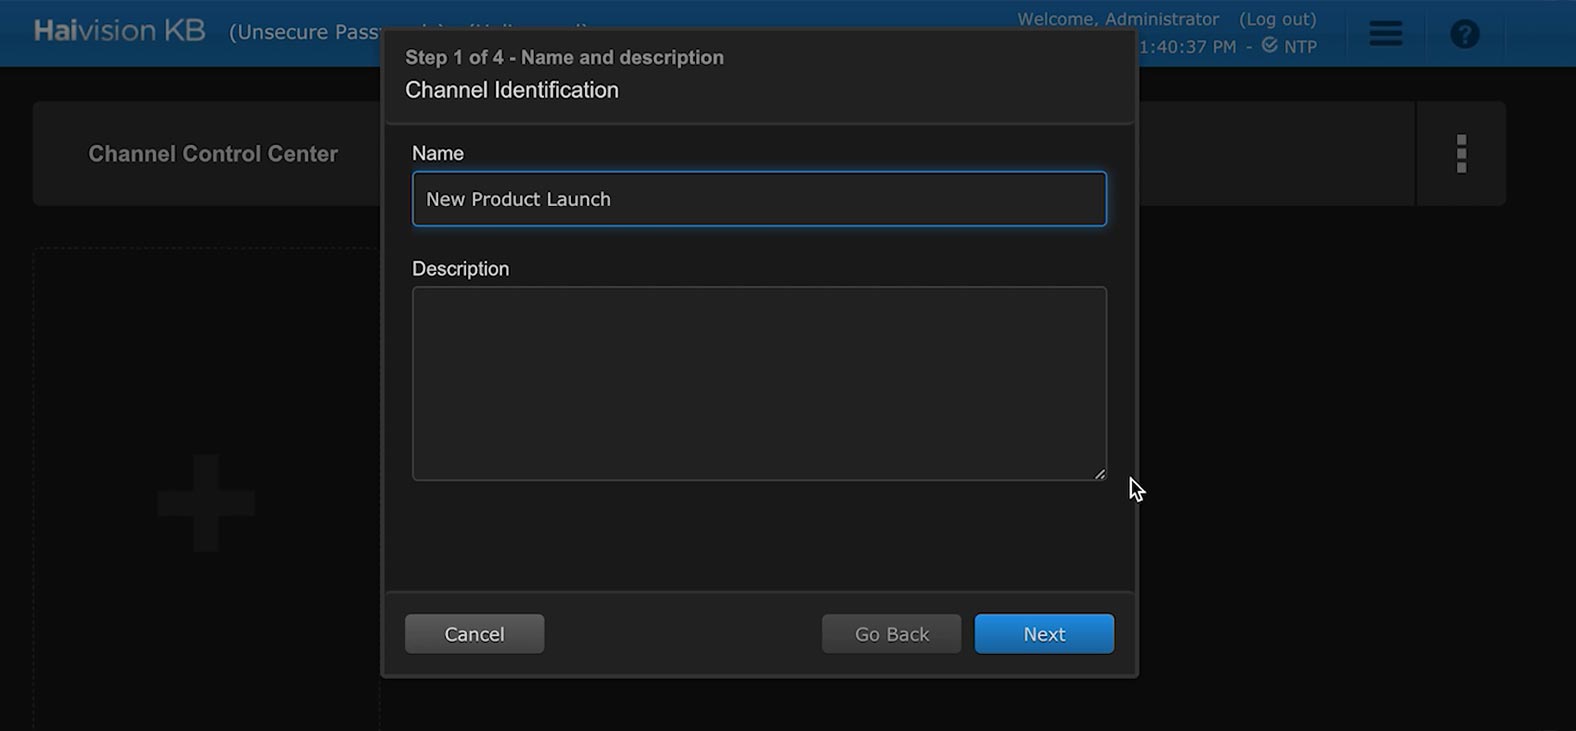
In the new window that appears, fill in the name and description of your channel, and click “Next.”
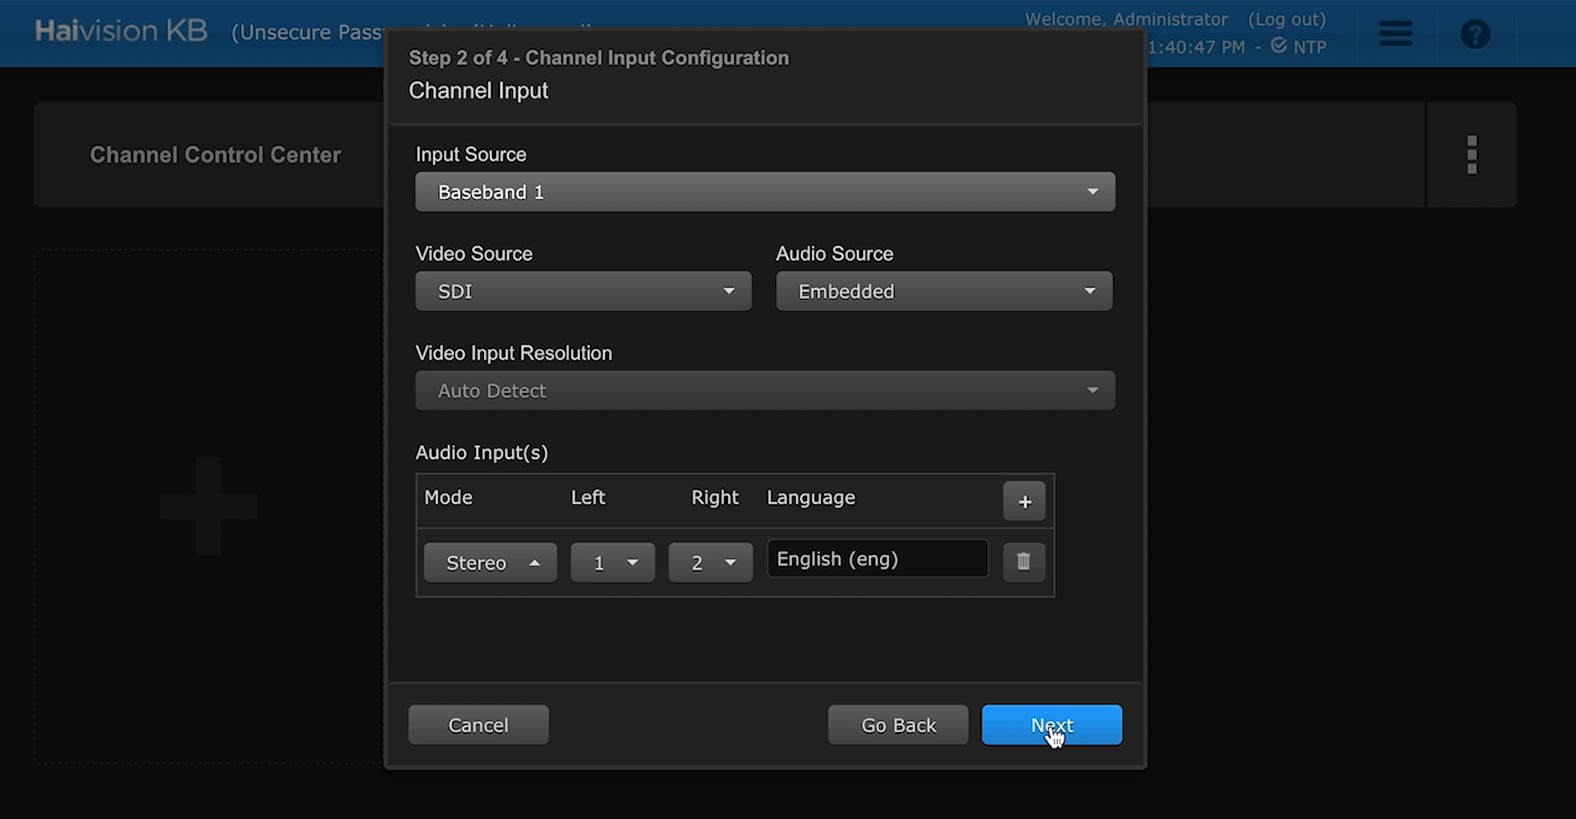
In the next window, select your connection source (typically either SDI or HDMI, depending on your setup) from the “Input Source” list. Click “Next.”
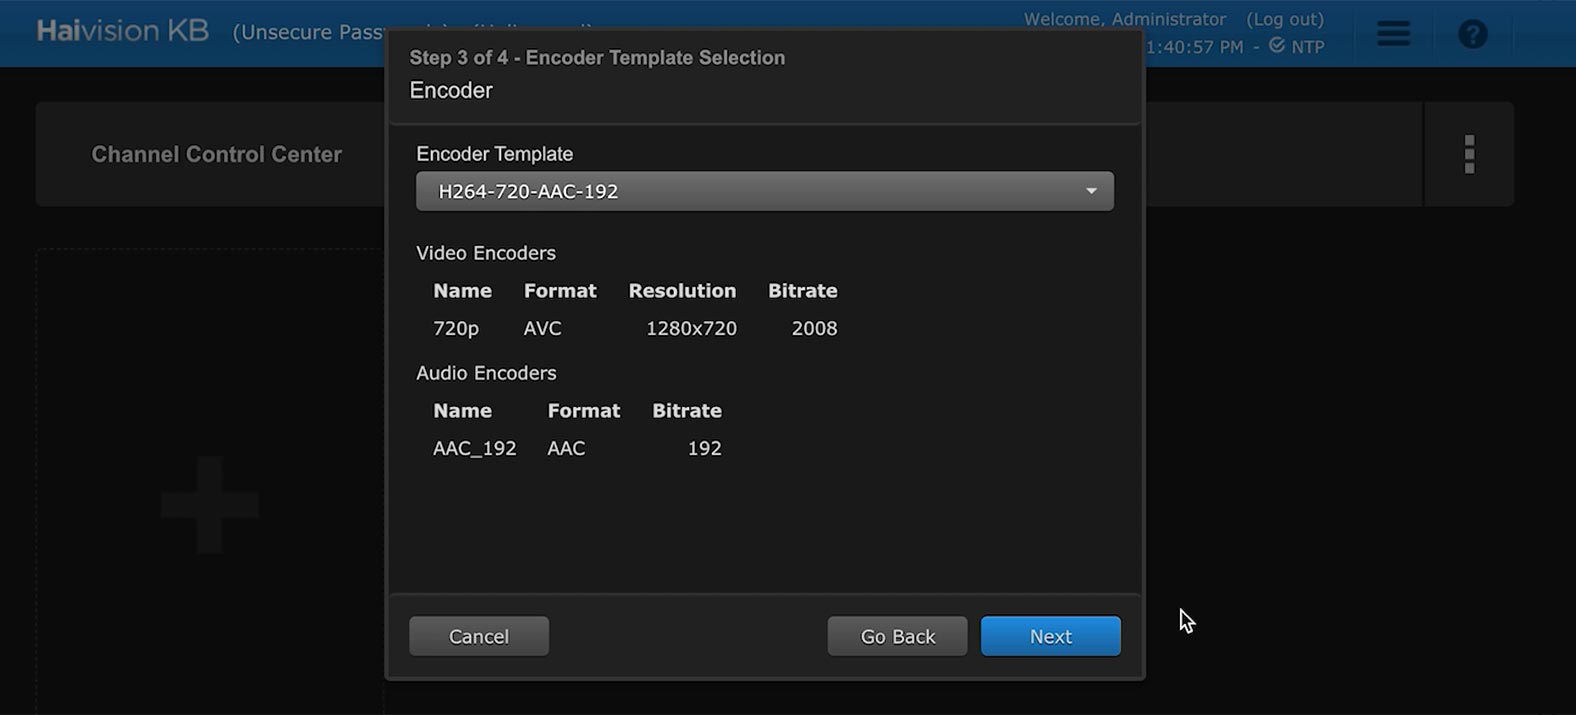
In the following window, you will be asked to select an “Encoder Template.” The best setting to use with Microsoft Teams is H264-720-AAC-192, which is the H.264 video codec in 720 resolution. Click “Next.”
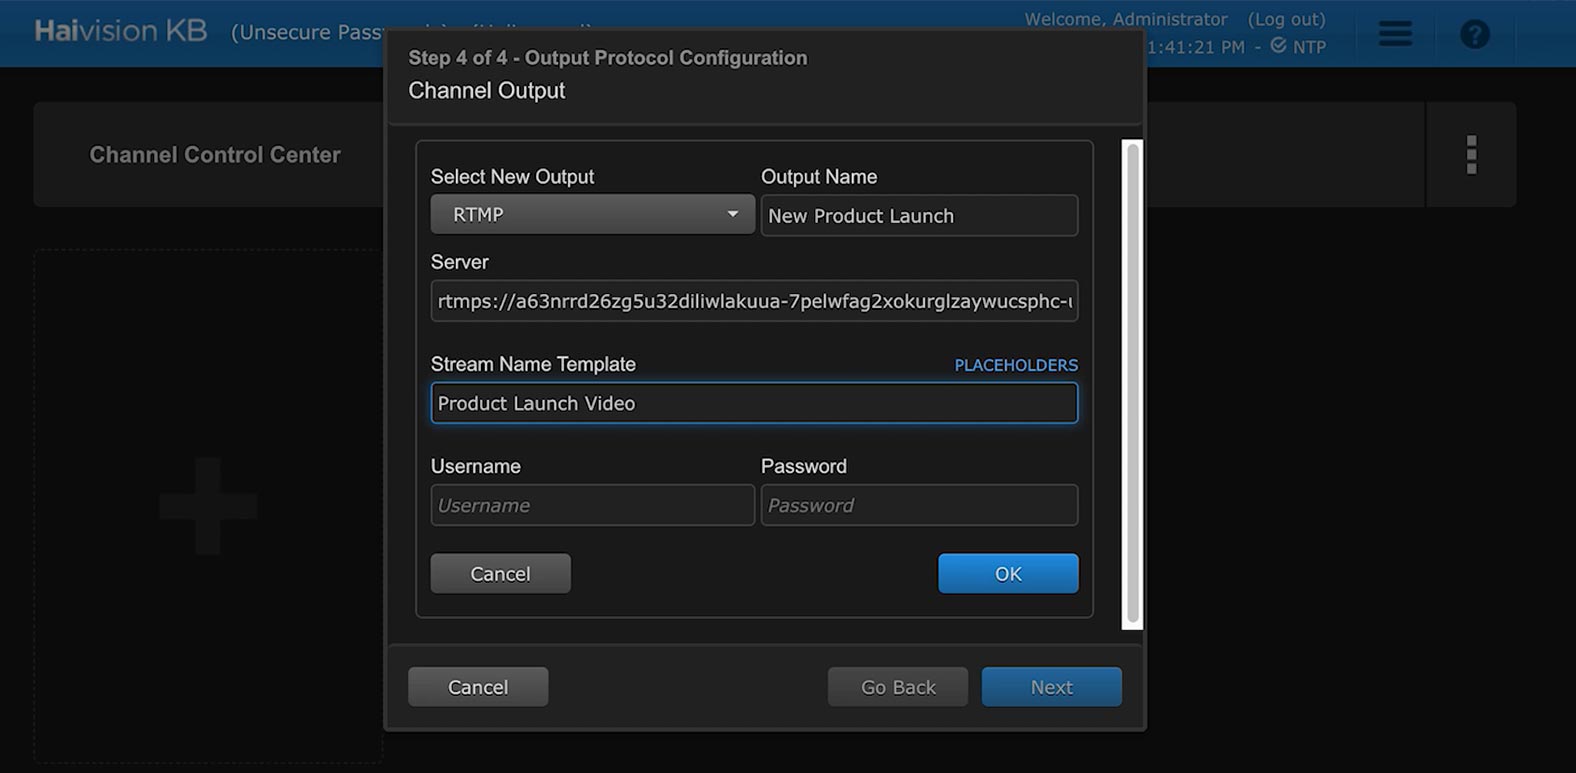
In the Channel Output panel, choose “RTMP.” Write your video stream’s name in “Output Name,” and then paste the Server Ingest URL you copied from Microsoft Teams into “Server.” With that done, you can now complete your channel setup.
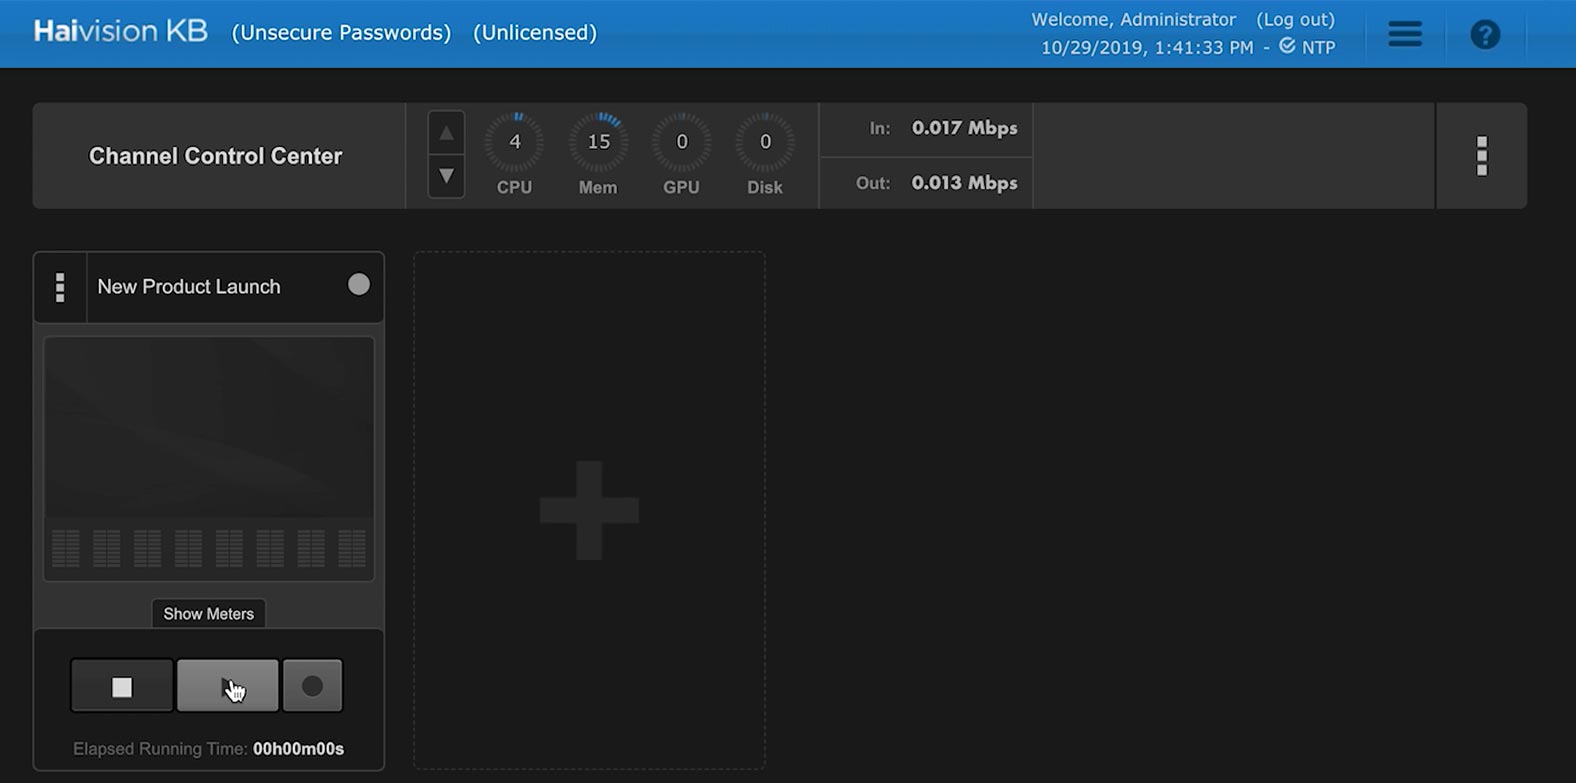
Step 6: Pressing Play
Once you have completed channel setup, you will be returned to the Channel Control Center. Click on the play icon beneath your stream window – the indicator light on the top right of the window will turn green, at which point you are ready to start streaming from your video encoder.
With your video encoder streaming live, you can now return to Microsoft Teams. Once you are ready to broadcast your video live, click on “Start event.”
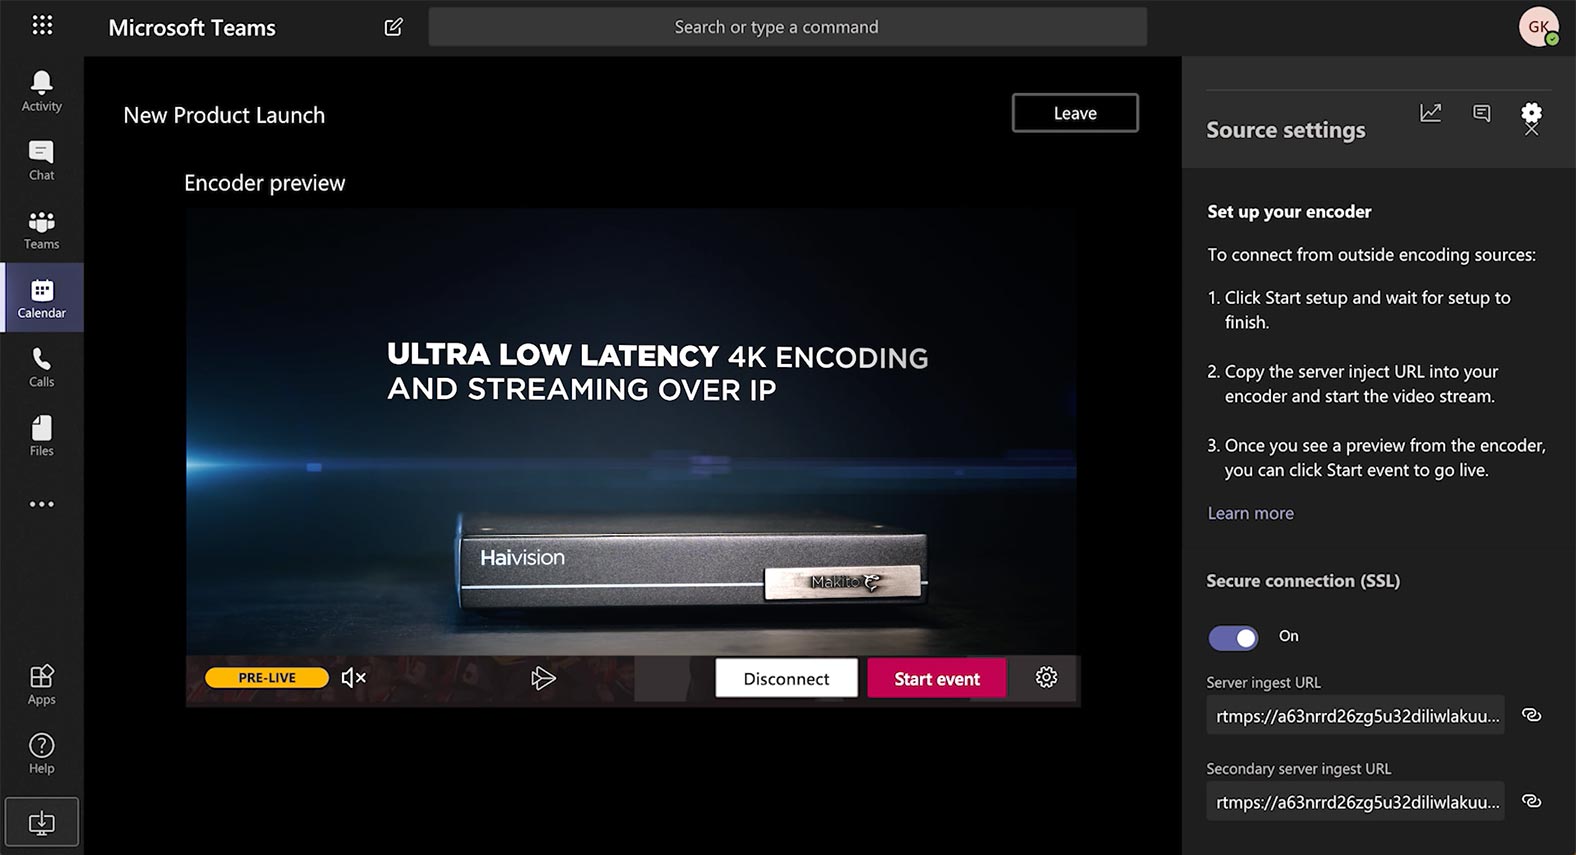
You are now streaming live video with Microsoft Teams!
For the more visually-inclined, we also have a video walk-through for setting up a Haivision KB video encoder for a Microsoft Team live event. Watch below to see how you can have your video encoder set up, and your live event streaming in less than two minutes.
